Posts

IBM Watson

Image
Introduction: The focus of this Project was to get familiar with web sockets and IBM Watson. The main objectives were to (1) translate speech to text, (2) add a command to launch an application, and (3) detect a command that translates a phrase into french and then play it back. Problem Discussion: The first step was to create an IBM account in order to get credentials to access IBM Cloud Services. The instructor provided some code for running the program. I added to it in order for it do the requirements. 1. Translating Speech to Text The credentials allowed me to use the Speech to Text services from IBM Cloud Services. The code below allowed me to interpret the words that Watson picked up. The run started by playing the greeting. Then it listened for the keywords. When "Watson" was heard, it printed that it found a command, and set the command state to "started". After I said "Watson", i said "Ignore", which was another keyword. ...
Web Server

Image
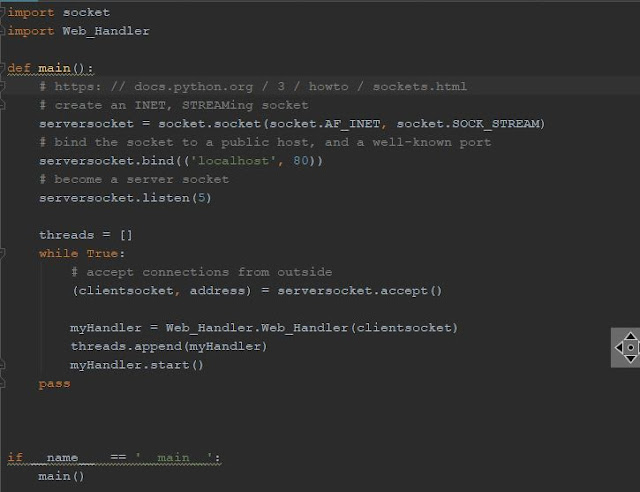
Introduction: Below is the code provided by the instructor for this project. A.  One of the purposes of this project is to test the web server with multiple files types. Those types are an HTML file, an image file type, and any other file type. B.  The other purpose of this project was to implement persistent connection or the sending of files in chunks. Main function: Before creating the main function, socket and the function Web_Handler were imported. The main function creates the server socket needed at port 80. The socket then accepts connections coming in from the outside. It then calls the Web_Handler function to continue. The Web_Handler function: This is where the header is sent, the request is processed, and the body are created. This function is called by the main method to take care of these processes. Problem Discussion: A. The first task is to use the code provided to test the WebServer with multiple file types. 1.  The fir...

SushiBot

Image
INTRODUCTION: This assignment was to make a bot that played the game Sushi Go Round . The objective was to  follow the tutorial found here .  I will go through the steps that i did to build the bot from the tutorial. Testing will be in blue . Errors and problems that i encountered will be in red . Explanations are in black. Below is the full demonstration of the finished bot. PROBLEM DISCUSSION: Step 1. Creating new Python Project I created a python project and i opened it in PyCharm. STEP 2. Downloading Libraries The first thing i did was download python 3 from Anaconda, Inc. I then downloaded the PyCharm Community Edition and set my paths correctly. *Problem* The tutorial required that i download and install additional python libraries. However, i was not able to download them directly from the links provided, because some of the libraries were used for an older version of python. I attempted to look for alternatives and download them. I wro...